How to connect Sony headphones to Mac should be simple, but if you’ve ever tried, you know that sometimes technology has its own plans. I recall the first time I attempted to pair my Sony WH-1000XM5 with my MacBook Pro clicking through a bunch of menus and still no sound. It was, to put it mildly, frustrating. But after a little trial and error, I found the precise steps that make this whole connection process smooth every time.
In this article, I’ll walk you through everything you need to know to connect your Sony headphones to a Mac step by step, Bluetooth pairing, troubleshooting and how to make your audio experience better than ever. You can also check out our complete guide on how to connect Sony headphones to Bluetooth for pairing across multiple devices.
Get your Mac and Sony Headphones ready.
Before you start working to pair your Sony headphones with your Mac, make sure you properly set the stage. Just think of it as the pre-workout stretch if you skip this step, the whole process can be painful, and trust me, I’ve been there.
View Details On Amazon

Check Battery Levels
First things first: battery. If your headphones are low on juice, Bluetooth pairing can be finicky. I always charge my headphones to 50% before trying to connect. So in practice pairing when low battery is as good as running a marathon on an empty stomach i.e. it is possible, but not fun.
Update Your Mac
Next up, software. Apple often updates macOS for performance and Bluetooth problems. It’s a step that it is easy to forget, but which can save hours tracking down issues. Visit System Settings > General > Software Update and make sure your Mac is up to date. Believe me, even just an update can fix things that look unfixable.
Reset Headphones (If Needed)
If your Sony headphones find themselves linked to many devices, a reset can sometimes purge older connections and provide at least a temporary fresh start. With most Sony models, just hold down the power button for 7 seconds to reset them or follow device-specific procedures. I have learned the hard way though that old pairings can stop new pairs from connecting so this is something I do every time I pair with a new device.
Clear Bluetooth Cache on Mac (Optional but Useful)
Occasionally your Mac clings to old Bluetooth connections, which can get in the way of new pairings. Try clearing the Bluetooth cache:
- Disable Bluetooth from System Settings > Bluetooth.
- Press + Option and click the Bluetooth icon in menu bar.
- Select Reset the Bluetooth module.
- Reboot your Mac and flip on Bluetooth.
This might sound techy, but it’s a lifesaver. Sonys: once I rebooted/refreshed, Sonys didn’t miss a beat to connect.
Gather Necessary Accessories
If you intend to use a connection that has a wire as a backup, take steps to ensure you’ll have the right cables. For most models, all you need is a regular 3.5mm audio cable. If you have a newer Mac model that lacks a headphone jack, a USB-C to 3.5mm adapter will be useful. I always have one of these adapters in my desk drawer it’s saved me more than once when I’ve been on the phone last-minute.
Pro Tip: If you are interested in other Sony headphones and Mac compatibility, read our comprehensive guide on pairing Sony headphones to Mac.
Connecting via Bluetooth
With your Mac and headphones ready, it’s time to connect them to one another over Bluetooth. If you’re facing Bluetooth-specific pairing challenges, our detailed walkthrough on how to connect Bluetooth headphones Sony might help you troubleshoot faster. I’ve wasted more than a few minutes clicking around in exasperation before remembering that the only way to deal with it is patiently and methodically.
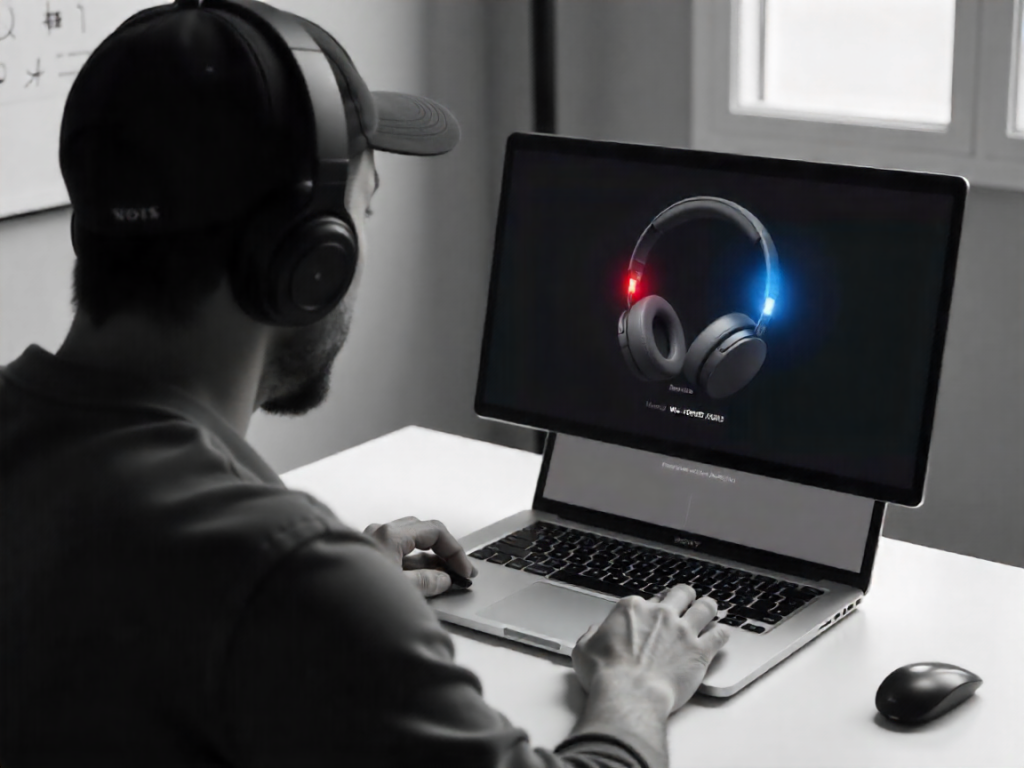
Step 1: Make Headphones Discoverable (Or in Pairing Mode)
If you’re using most Sony headphones, for example, hold the power button down until you see the LED flash blue and red. I usually hang on a second longer just to ensure it’s discoverable. That additional little bit of time helps to keep those connection issues at bay.
While other models, such as the WH-1000XM5 (or WH-1000XM4) still may require pressing a customization or slightly different combination. If the LED fails to flash, consult your model’s manual.
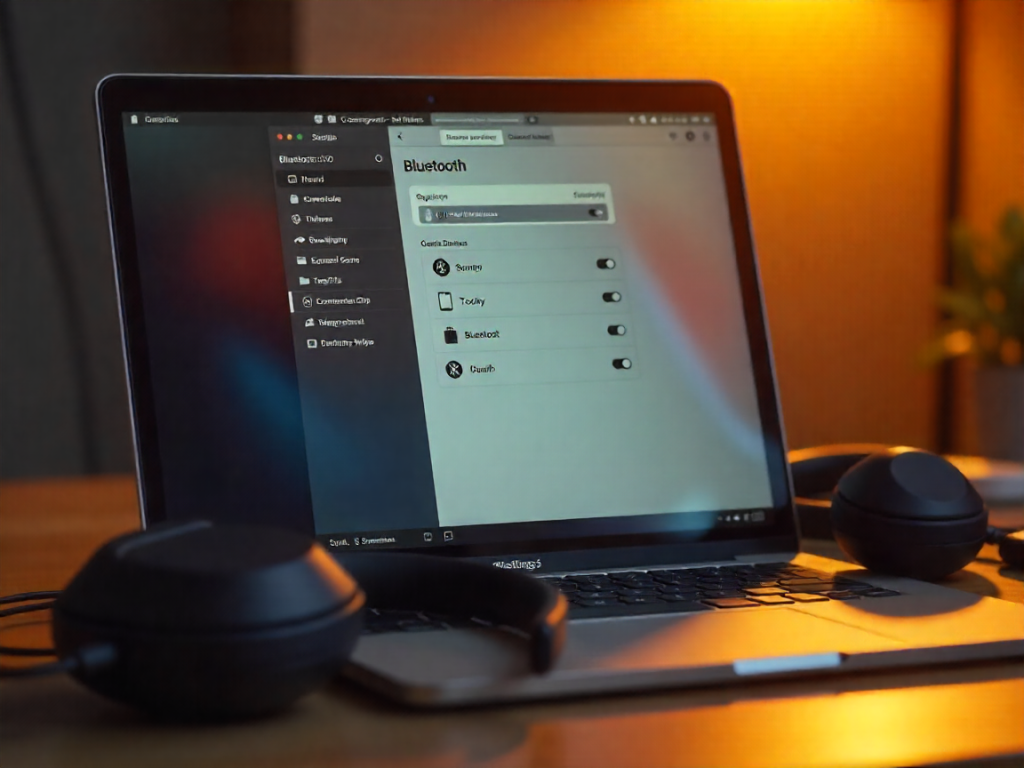
Step 2: Now Open the Bluetooth Setting on Mac
On your Mac, go to System Settings >Bluetooth and ensure that Bluetooth is on. Your Mac will begin looking for nearby devices. Sometimes it takes a few seconds for a device in pairing mode to show up, so be patient.
One trick I learned on that front is that if the headphones don’t appear right away tap over to Bluetooth, turn it off, then turn it back on. This usually solves rudimentary hiccups and pops it up in the list.
Step 3: Pair Your Headphones
When your Sony headgear shows up, click Connect. Your Mac will authenticate and connect to the session. When the senheiser headphone LED stays in solid blue, it is successfully paired. I always test the sound right away, to check that I haven’t blown anything up.
Step 4: Test the Connection
(If no sound, play a song, podcast or video to check the audio again.) Testing immediately will help you catch little things like static, delay or dropouts before they become infuriating. Small issues are usually fixed by reconnecting or rebotting the Mac.
Troubleshooting Tips for Bluetooth Pairing
- Stay close: Bluetooth is good for a distance of about 30 feet. Walls and electronics can interfere.
- Minimize the interference: Interference from other Bluetooth devices or Wi-Fi routers can curb BT device connectivity. Roberto says a change of scenery to something quiet may help.
- Update your firmware: Checking for updates can be done using the Sony Headphones Connect app, maintaining stable music playback.
- Unpair old devices: If you’re switching between Mac and PC, you can also see how to connect Sony headphones to Windows 11 smoothly without interference.
But once you complete these steps and are patient, the process of connecting Sony headphones to your Mac over Bluetooth is easy and not delicate.
Using a Wired Connection
Bluetooth is great, but sometimes it makes sense not to use it. Whether it be because your battery life is dwindling, there’s interference in the area or you want that maximum audio fidelity, a wired connection can save the day.
What You Need
To plug your Sony headphones in, you’ll need:
- A 3.5mm audio cable (most Sony headphones come with)
- A Mac with a headphone jack or a USB-C/Lightning adapter (unless you don’t have an audio port in side your Mac detergent).
Laptop users can also follow our step-by-step article on how to connect Sony headphones to a laptop for seamless wired and wireless setup.
Check Latest Price
Step 1: Plug in the Cable
Plug the 3.5mm cable into your headphones and into the headphone jack or adapter of your Mac. I always ensure a really good connection at both ends as for whatever reason just slightly unseating the plug happens more than I would expect, and it can cause annoying sound problems. Perhaps you can twist the connector slightly as you insert it, and that might help make sure it connects tightly.
Step 2: Configure Your Mac
Once paired the Mac should connect, and it should automatically recognize your Bluetooth headphones as an audio output device. You can test this by going to System Settings > Sound > Output and playing on your Sony Headphones. I want to remember this option in case I switch an audio device and macOS reverts back to the speakers.
Step 3: Test the Audio
Play any song, podcast, or video to hear the audio coming through. Wired connections are generally more stable than Bluetooth, and I’ve experienced almost no latency using them (very useful when video editing or gaming).
Advantages of Wired Connections
- Less delay: Virtually no lag, too ideal for video calls, gaming and music production.
- Reliable quality sound: With no chance of signal drop or loss, wired headsets provide a truly premium-quality listening experience.
- No battery life: Wired audio does not have to rely on the headphone battery life, and thank goodness for that when you’re working nonstop.
- Stable in noisy environment : Unlike bluetooth, the same devices don’t block signal for wired connections.
Troubleshooting Wired Connections
Not even wired connections are totally foolproof. Here’s what you can do if you experience problems:
- Make sure both of the cable’s ends have been fully inserted.
- Make sure the sound of your Mac is outputting to the headphones in System Settings > Sound > Output.
- Swap in a different cable to eliminate damage concerns.
- Reboot your Mac to reset the system’s detection of third-party audio devices.
The wired connection may seem a little old-school, but it is often the easiest and most stable. It’s one I personally fall back on when I want to experience pure, high-quality audio and not waste a moment fumbling with Bluetooth pairing or battery-life concerns.
Related Resource: Check out TechPluto’s guide on how to connect sony headphones to windows 11 for added help.
Troubleshooting Common Issues
The best headphones can sometimes run into problems, and Sony’s headphones are no different. I’ve probably easily clocked over 10 hours fiddling before I realized that a methodical approach is what prevails.
Headphones Not Appearing in Bluetooth
- Check the pairing mode: Make sure LED on your headphone is flashing blue/red.
- Restart Bluetooth: Switch off Bluetooth on your Mac, wait a few seconds, then turn it back on.
- Forget old devices: For example, if your headphones are listed as a previously connected device, forget them to get rid of the pairing.
- Restart your Mac: This only takes a few seconds and can often fix any transient problems.
Sound Cutting Out or Lagging
- Stay close: Bluetooth has an effective range of around 30 feet; walls and electronics can interfere with performance.
- Enable only one connection: Disconnect your headphones from any other device, if possible.
- Update firmware: Make sure your headphones are fully updated by using the Sony Headphones Connect app.
- Less interference: Get out of the Wi-Fi/Bluetooth crowd.
Multiple Device Conflicts
If your headphones keep bouncing between devices, then ensure that your Mac is set as the active audio device. Unplugging other devices or disabling auto connect in either the sony app can sometimes stabilize connections.
Audio Settings Issues
- Ensure that your Mac is sending audio to the headphones by going to System Preferences > Sound > Output.
- Profession of Faith The following professions of faith may be said by the whole congregation, with volume or lvge adjusted to suit your circumstances.
- If you are using a wired connection, check if the cable is damaged, or not plugged in all the way.
Persistent Problems
If you’ve attempted all the above and run into some issues, then you should probably reset your headphones to their default factory settings or contact Sony support. And once in a while, weird hardware or firmware issues need an expert’s hand.
Optimizing Audio Settings
After connecting your Sony headphones to a Mac, tweaking audio settings might help repay the favor. If you’re particular about clarity and tone, our guide to the best headphones for music quality breaks down what affects true sound performance.
Step 1: Choose Your Headphones as Output Device
System Settings > Sound > Output and choose your Sony headphones. I mention this step to double-check because for whatever reason, macOS will sometimes reset to the built-in speakers after an update or restart.
Step 2: Volume and Balance It Up
Adjust the volume to a desirable level. If you feel one side is louder, adjust the left/right balance. It’s a tiny tweak that can make a difference, especially for music with busy mixes or podcasts featuring multiple voices.
Step 3: Turn EQ and Advanced Options On
Some Sony headphones get the optional feature treatment through the Sony Headphones Connect app:
Noise canceling: Block out background noise to concentrate on your work.
Ambient sound control: adjust how much can be heard, for safety when walking or cycling.
Equalizer presets: Choose the best boost for your bass, treble or vocals on your content.
When listening to different genres I also frequently switch between “Bright” and “Dynamic” EQ modes. Its wild how much of a difference EQ settings even make on expensive headphones.
Step 4: Try With Other Content
Play music, podcasts or videos to see if your settings are working. Hearing all variety of sounds will also allow you to find the perfect volume, balance and EQ.
Step 5: Save Your Settings
Not all the EQ settings you try on the Mac save, so it’s a good idea to keep a note or just use your presets in Sony’s app so that you don’t lose your favorite setup.
Pro Tip: You can also read Audioviser’s guide on optimizing the audio for more detail.
Additional Tips and Tricks
Through the years, I’ve learned a few handy tips and tricks that make using Sony headphones with my Mac even better.
Keep Firmware Updated
FIRMWARE UPGRADE – The latest generation of firmware version 6 updates This incaprovides Alikesenhanced connectivity to previous devices, answer calls with just one touch and improves the stability of the features and sound quality. Keep an eye out for updates on the Sony Headphones Connect app to keep up-to-date.
Manage Multiple Device Connections
You can pair your Sony headphones to your phone and other devices, but can only have one active connection at a time. If you want a reliable connection to your Mac, I suggest that you unplug other devices.
Use Charging Strategically
Avoiding breaks in charging can also help. I normally charge my headphones overnight and keep a spare cable nearby in case I need to plug in.
Optimize Workspace Environment
If you work in a crowded office or Wi-Fi-heavy area, Bluetooth interference is par for the course. My Mac and headphones are within 10-15 feet and away from other electronic devices.
Explore Third-Party Apps
For audiophiles, or video editors, applications such as Boom 3D or eqMac can even enable more complex sound customization than macOS grants Eset nod32 vs avast eond organize by default.
Quick Connection Shortcuts
The Control Center menu is something that many Mac users hardly ever notice. You can easily change the audio output to your Sony headphones from those buried settings, and it’s a real lifesaver if you’re multitasking.
Consider Audio Profiles
What that means is, if you flit back and forth between movies, music and calls often, establish several different EQ profiles or simply use the Sony app to save custom modes. This maintains the best sound quality wherever and whenever you are using it.
Connecting Sony Headphones to Mac FAQ
1. How do I pair Sony headphones?
[Power Button] Keep the power button pressed until LED is flashing blue and red. On models such as WH-1000XM5/4, you might require a customized button. When in doubt, refer to your manual.
2. Why won’t my Sony headphones connect to my Mac?
Try to make sure they’re in pairing mode, toggle Bluetooth off/on, delete old pairings and restart your Mac. Clearing Bluetooth cache might also help out.
3. I have sony headphones and can I use them with a mac by a wire?
Yes. Connect the 3.5mm audio cable (or USB-C converter if no headphone jack). Choose your headset in the System Settings > Sound > Output.
4. What if Bluetooth sound comes out intermittently or lags?
Keep devices close (within 30 ft), reduce interference, and sign in to the Sony app and update firmware.
5. How Do I Reset My Sony Headphones?
Press the power button for approximately 7 seconds (the timing differs depending on the model). That clears old pairings and makes room for some new hookups.”
6. How can I get the best sound on my Mac with Sony headphones?
System Settings>Sound, pick your Head set & adjust volume/balance using Sony’s exclusive headphones Connect app for Android and iOS to adjust (EQ) the Mix of music & see what you’re listening to with one tap of a button.
7. Are Sony headphones multipairing or connect to two devices?
They can pair to multiple devices, but will only have one live connection at a time. Disconnect others for mac
Conclusion
It may seem a little daunting at first to figure out how to connect Sony headphones to Bluetooth, but this guide shows that with proper preparation and methodical steps, it’s well within our reach. From making sure your devices are charged and updated to carefully putting your headphones into pairing mode, every action counts when crafting a distraction-free experience. And if you’re looking to upgrade your experience even more, check out our picks for the top bass headphones with deep, powerful sound.
Even when problems come up like if your headphones aren’t in your Bluetooth settings, audio isn’t playing back, or on some other device the connection between it and those headphones is constantly dropping out there are easy steps to address them, like resetting or clearing the Bluetooth cache on devices, updating firmware and more. Yeah it’s not just for pairing – take the time to optimize your fucking audio settings. Customise output based on music genre, adjust your sound experience according to room type or simply use EQ modes such as rock, pop and easy.
In reality, if you keep them up to date with new firmware updates, manage competing connections across multiple devices and dabble in quick access options (via Control Center shortcuts for example) on macOS, then hopefully you should get a consistent performance. Cord management, however, was our lowest priority throughout testing because the Marque M155 has poor sound quality for the price.
In the end, Sony’s expertise and macOS’s flexibility add up to professional-grade sound for your Mac that isn’t a pain in the ass. By using these helpful hints and other tips, you can not only avoid annoyances but get the most out of your listening experience.