So you’ve recently picked up a pair of Beats headphones (or perhaps dug an old pair out of the closet), and now you’re pondering how to get them working. You’re not alone I’ve been there. In fact, I still remember the first time I took my (then glossy, then blocky) Beats Studio 3 in one hand and stared at a Midge-like button with the other: “Which way? Do I press hard or gently? So is it on already and I’m not hearing anything?
In this guide, I will show you step by step exactly how to turn on Beats headphones. I will also include advice for avoiding common pitfalls and suggestions of what to do when nothing else seems to work. By the time you’re done, you can power up any modern Beats headphone or earbud with confidence.
Why Turning On the Beat Can Be So Confounding
If you’ve ever had a new pair of Beats headphones in your hands and felt the need to press every button as if it’s bomb defusal time, know that you are not alone. Switch them on and Beats can suddenly be unexpectedly confusing – even for somebody who’s been using headphones to listen to music for years. The reason? Beats, as a modern tech gadget, has evolved over time, and with that evolution came choice.
Different models, different form factors, different buttons and sometimes even completely other behavior. Some also switch on automatically when you pull them out of the case. Others require you to press and hold a button for precisely two seconds, not one second, not three. A few older models still rely on sliding switches instead of buttons.
Part of the confusion, however, is also due to a dearth of visual feedback. Beats, unlike smartphones with blaring screens and logos, are built around a small LED light that flashes at you in Morse-like codes. That is why if you don’t know what those lights mean white, red or blinking blue it is easy to believe that something’s wrong. I even once held my Beats Studio 3 upside down thinking they were dead, only to realize the LED light was on the other side.
And then there’s that whole “power on”/“pairing mode” confusion. A lot of people actually think that once the light is blinking, they are ready to play music. But blinking lights can also indicate “powering on,” “low battery” or even “pairing,” depending on what color blinks how often. I’ve watched someone fumble for 10 minutes trying to connect their Beats to a phone that’s not even in Bluetooth range, all because they didn’t know what the flashing meant.
Finally, the battery and firmware can conspire to make a fine set of Beats appear “dead.” And sometimes they just need to be charged, or reset. Yes, I have wasted a whole morning’s adventure spent “fixing” my Beats once or twice before it dawned on me that I’d forgotten to charge them the night before.
In other words, no, the confusion doesn’t indicate that your headphones are overly complex — it’s just that Beats gives each one its own distinct flavor. Once you get the hang of each, switching them on is as instinctive as flicking a light switch.
View Details On Amazon

Anatomy 101: Buttons, lights and ports
It’s a good idea to familiarize yourself with your Beats’ basic anatomy before pressing anything. It’s like familiarizing yourself with the dashboard of your car before you drive away. Every model of Beats headphones — from the Solo to the Studio Buds has three main components that are most important when turning it on: buttons, lights and ports.
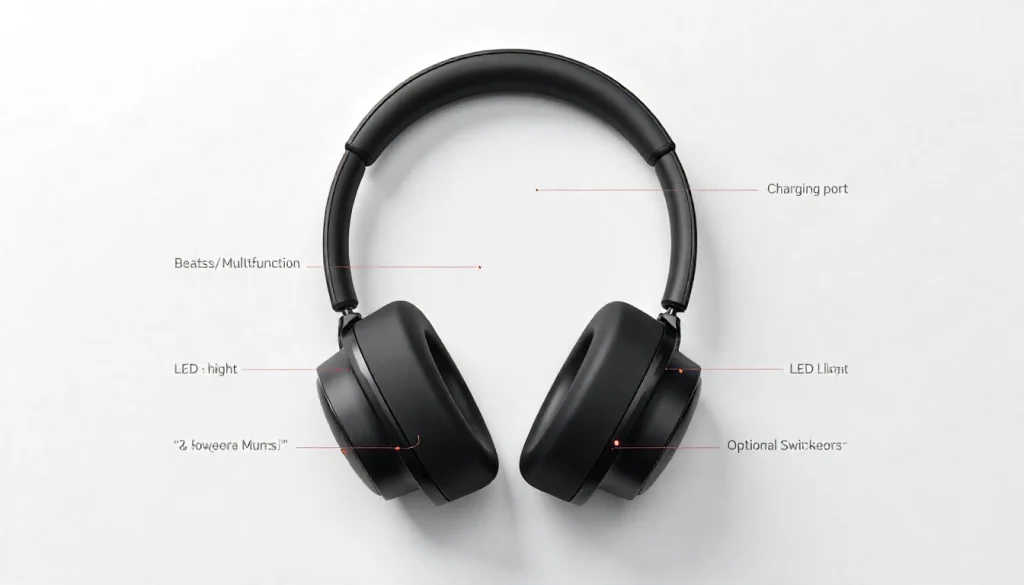
1. Power / Multifunction Button
Nearly all Beats headphones have a power or multifunction button. It’s usually small, round and barely part of the design (Beats loves minimalism). For over-ear models like the Studio 3 or Solo Pro, you’ll find it on one of the ear cups. On earbuds, it’s typically on the face of the earbud itself or a part of the control module along the wire for neckband models.
The catch is that the same button often does double duty for other features, such as pairing with your device, answering phone calls or pausing music it depends on how long you press it. So it all comes down to length: a tiny tap can pause music but nudging your finger longer makes the device turn on.
2. LED Light Indicator
Your Beats’ sole method of ‘talking’ to you is this tiny dot. For power, charge and connection status it communicates by color and blinking patterns.
- White light (non-blinking): power on and connected.
- White flashing: In pairing status or searching device.
- Red or amber: when battery is low or charging.
- No light: shut down or no power.
The best clue for when you’re lost and/or scared is this LED light. It will even tell you more than you think you just have to know how to read it.
3. Charging Port
All Beats wireless products include a charging port. (For earlier models, it may be Micro-USB.) The charging port does more than juice up your wireless earbuds and headphones; it can be a conductor for when your pair of Beats don’t turn on. If the battery is drained all-the-way down, you may have even need to let it charge up for a few minutes before the LED responds.
4. Switches or Sensors (if your model has them)
Some Beats models, including the Beats Flex, forgo a button in favor of a small on/off slider switch. Others—including the Beats Fit Pro—have in- ear sensors so they automatically pause or play depending on whether you’re wearing them. These could were able to power states in some models as well so the earbuds may be what “turns them on.”
Turning On Popular Beats Models
So here’s the part you probably came here to read: How to turn your Beats on. They’re all slightly different, but once you do it a couple times, it becomes second nature.
Beats Solo/Studio/Pro (Over-Ear or On-Ear)
Powering your full-size Beats headphones on is really easy, once you know where to look.
- Locate the power button on one of the ear cups (usually to the right). It’s often a tiny round button near the “b” logo or directly below it.
- Just press and hold it for 1-2 seconds. Is the LED light flickering or on?
- When it is lit, let go of the button. The headphones are now on.
When you hold the button only a little, nothing happens. Too long, and it might enter pairing mode — not dangerous, but perplexing.
If lights are present at all it may be that your battery is just drained. Plug the headphones in wait about 15–20 minutes, then plug them out and try again.
Pro Tip: My Beats Studio 3 tricked me my first week having them too I’d swear they were broken because the light didn’t blink right away. Well, it turns out there is a delay between when you hit the button and when the LED responds. Patience is key!
Check Latest Price
Beats Studio Buds/ Powerbeats / Beats Fit Pro (True Wireless Edition)
These are more streamlined, but no less clever. They are designed to automatically power on when you remove them from the charging case If they don’t turn on, here’s what to do.
Beats Studio Buds or Beats Fit Pro
- Remove the earbuds from the case.
- They should power on automatically. If they do not, press and hold the “b” button on one earbud until its LED flashes.
- If nothing does, return them to the case for a few minutes’ charging and then try again.
Powerbeats / Powerbeats Pro
- Find the power button on the left ear hook (or up near the inline module for older Powerbeats).
- Only the Go button should be held down long enough to get the light to turn on (about 1 second).
- You can now release the button, and your Beats should be turned on and ready to pair.
The case for these models is needed as a crutch, thanks to their reliance on the battery in the case. So if they won’t power on, ensure that you haven’t just charged the earbuds and forgotten about the case. I once spent an hour trying to “fix” my Powerbeats before realizing the case battery was 0%. Lesson learned.
Beats Flex and Beats Pill
Beats Flex (Neckband Style)
The flex also does not have a power button, but instead there is a sliding switch on the control module, which is located between the volume buttons. Slide it to “on” (you’ll feel a small click), and a white LED will light up, indicating that your Beats are awake and waiting.
To turn it off, all you do is slide it back an easy and satisfying physical thing.
Beats Pill (Portable Speaker)
O.K., not strictly headphones, but still something lots of people Google “how to turn on” and intend as the Pill. Here’s how:
- Find the power button in the center of front panel.
- Hold until the row of LEDs illuminates.
- When that light is solid, it’s on and ready to pair.
Older models could take a slightly longer press or show different colors of light, but the principle is the same: hold it down until you see life.
Pairing VS Turning On – What’s The Difference?
Here’s what I wish I had learned earlier: Powering up your Beats and pairing them are not the same thing. And many people conflate the two, not least because there are flashing lights and some button pushing in both cases.
When you press the power button on your Beats, it’s powering up the hardware. It’s the equivalent of turning your car on the engine is running but you haven’t started driving.
Pairing, however, is when your Beats connect to another device (your phone, laptop or tablet) using Bluetooth. Think of it as saying to your headphones, “Hey, that’s my phone talk to that device a little farther away, not the one right there next to it.”
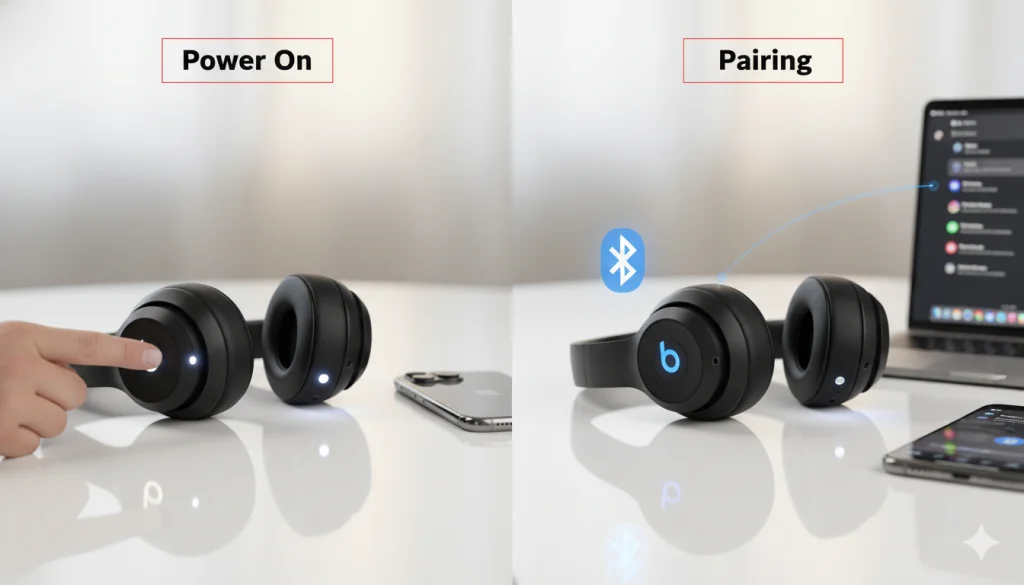
How to Know the Difference
- When your Beats turn on, the white LED you should see in battery light gauge will stay steady or slowly blink.
- When it does that, the LED begins to flash quickly (white or blue, depending on model).
If you simply want to power your Beats on and not look up battery percentages or settings, no need for pairing. But for music or joining a Zoom call, you’ll need the pairing.
Auto-Pairing on Apple Devices
If you’re in the Apple ecosystem (that is, if you have an iPhone, iPad or Mac), then this will work well for you. Newer Beats now include the same chip found in AirPods, so those headphones will pair automatically. And, when you flip them on for the first time, a pop-up pops up in your screen asking if you’d like to connect no extra button pushing required.
The downside is it requires a manual pairing the first time, if you are an Android or Windows user. After that, the Beats often remember your device so every time you turn them on, they pair up automatically.
So if your Beats are charged up and you don’t hear anything chill. They’re likely not broken; they just need to be paired.
Common Problems and How to Fix Them
But even the best tech can have off days. From Beats that don’t turn on to those that look possessed (flashing lights for no apparent reason) I’ve broken down the most common issues and solutions — many of which I have personally tested through hours of trial-and-erroring.
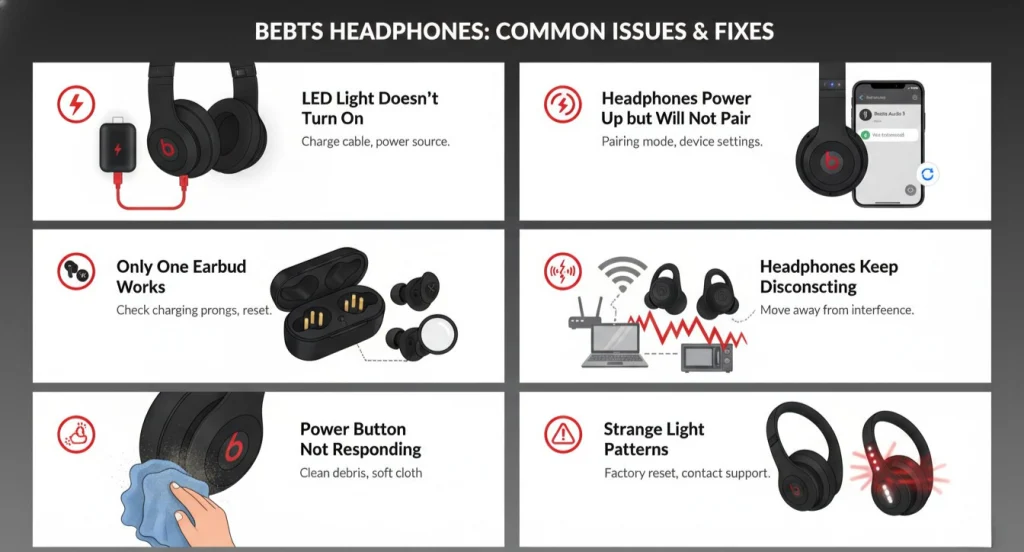
1. The LED Light Doesn’t Turn On
Potential reason: The battery is too low to wake up.
Fix:
- Plug the headphones into a power source and charge them for at least 10 –15 minutes.
- Some models take a moment to display the charging light, so don’t panic if it doesn’t appear right away.
- After it’s charged, press the power button and hold for two second.
2. Headphones Power Up but Will Not Pair
Problem: Bluetooth is having problems or there are too many paired devices.
Fix:
- Press and hold Power (Pairing Button) for about 5–10 seconds until the LED start flashing quickly.
- Forget the Beats on your phone’s list of Bluetooth devices, and then reconnect.
- If this doesn’t help, try resetting the headphones. For the most part, models will reset when you press and hold the power button along with the volume down button for around 10 seconds (refer to your specific model’s manual for exact steps).
I used to have my Beats Studio 3 suddenly refuse to connect with any device. I was about to pronounce them dead but then I realized they were still connected to my iPad in the other room. Sometimes, it’s that simple.
3. Only One Earbud Works
Possible causes: Imbalance between the batteries; charging pins not in contact or battery contacts dirty.
Fix:
- Put both of the earbuds back into the case, close it and leave for a couple minutes.
- Look for any dust or lint on the charging prongs.
- Attempt to reset the earbuds using the case (it’s often done by holding down on the button of the case for 15 seconds).
4. Headphones Keep Disconnecting
Possible reason: Interference, old firmware or battery power-insufficient.
Fix:
- Charge your Beats fully.
- Ensure your phone’s Bluetooth is updated (yes, the Bluetooth even has updates).
- And get away from powerful Wi-Fi routers that might interfere with the signal, or even microwave ovens.
5. Power Button Not Responding
Likely cause: Physical obstruction or firmware corruption.
Fix:
- Wipe around the button with a soft piece of cloth dirt and sweat can accumulate there.
- Try a reset(power + volume down).
- Should be its loose or physical damaged, now you should visit Apple Support (dont use any sharp tool free your warranty will void).
6. Strange Light Patterns
Occasionally your Beats flash red and white like a Christmas tree. It’s not a good sign, as it typically indicates a firmware or charging matter. You’d plug them in, walk away for an hour and unplug.
Most common problems are solved by these quick fixes. Headphones are computers now sometimes they just need a reboot and some patience.
Battery Care Details & Best Practices
If you take care of your Beats battery, it will take care of you for a few years. Ignore it and you’ll be dragging around a charger more often than your phone.
Here’s what I’ve found out (and sometimes it was the hard way):
1. Avoid Draining to Zero
All lithium batteries loathe to be near absolute zero. When they hit around 20–30% battery, try wrapping up your Beats to charge. This helps keep the cells healthy, and your battery working for longer.
2. Use the Right Charger
If you can, use the original charging cable. Low quality cables provide unstable power which results in charging errors or slow-charging. If you still have the original, go with a certified copy it’s worth the few extra dollars.
3. Keep It Cool (Literally)
Do not leave your Beats in hot cars, direct sunlight or near a space heater. Battery killer number one is heat. I once left mine in my car in the middle of a summer day … and let’s just say it was never quite the same battery life after that.
4. Don’t Overcharge
Newer Beats models feature a smarter charging system, but you’re still better off unplugging after a full charge. Keeping the air buds plugged in 24/7 can also degrade the battery over time.
5. Store with Half a Charge
If you won’t be using your Beats for a while (maybe you’re transitioning to speakers, or on the road), pack them up with around 50% charge. Batteries that are fully discharged or charged when stored will suffer greater damage than being kept half-charged.
6. Keep Firmware Updated
Apple frequently updates the firmware for its Beats products to improve power efficiency and Bluetooth performance. Up-to-date firmware will result in less bugs and better battery overall.
Adhering to these habits will help ensure that your Beats last for the long haul and remain powered up when you do have the need, instead of another frantic charge hunt.
What if nothing works: Support & Warranty
Sometimes, try as you might, your Beats refuse to play nice. Perhaps the button won’t work, the LED won’t flash or the charging port is a bit too suspiciously wobbly. That’s when you bring in the strongest support out there.
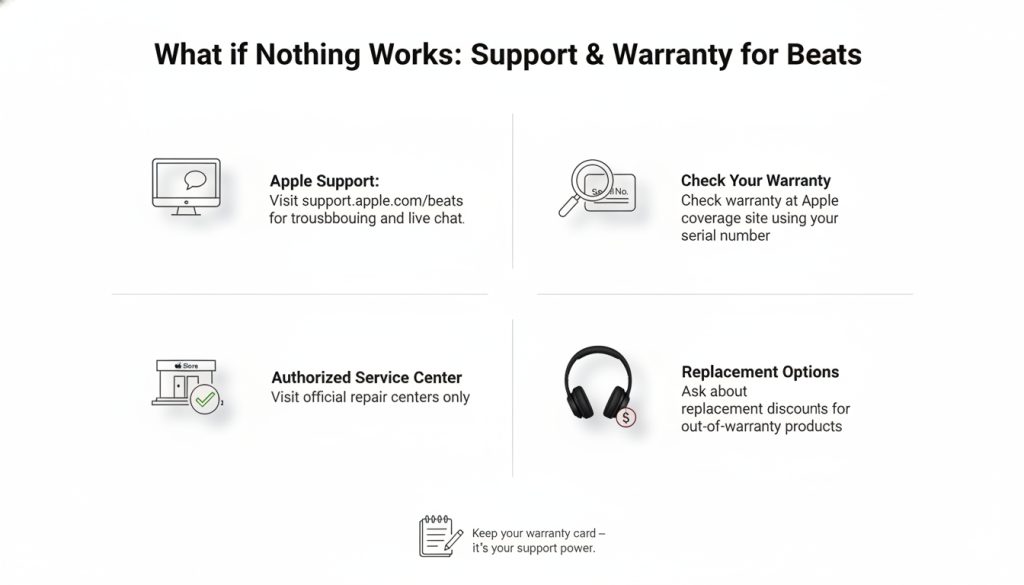
1. Apple Support
Go to support. apple. com/beats. You will see step-by-step troubleshooting for any given model, along with options to live chat and book a repair. Apple techs generally are able to run remote diagnostics and diagnose problems.
2. Check Your Warranty
Most Beats products include a one-year limited warranty, and if you bought AppleCare+, you may have extended coverage. To see if you’re covered under warranty, go to Apple’s coverage website and type in your serial number (which is typically printed on the box or beneath the ear cushion).
3. Visit an Authorized Service Center
If you’d prefer some in-person assistance, visit an authorized Apple Store or repair center. Stay away from unauthorized shops they may solve the issue but not give you warranty as well.
4. Replacement Options
If, however, your Beats really are beyond repair (and you don’t feel like fixing them yourself), Apple does sometimes offer a discount on replacements for out-of-warranty products. It’s a reasonable question to ask before buying another fresh pair.
Anecdotally, I once shipped off my Beats Solo Pro for a charging-related problem and they returned in equally pristine condition with nary a charge within a week. It was a reminder that retaining that warranty card is not just paperwork; it’s staying power.
Frequently Asked Questions
1. Why are my Beats headphones not turning on?
If your Beats won’t charge, chances are the battery is dead. Charge the TWS earbuds for 15–20 mins (You can also take a fully charged phone and charge both together), then long-press to power it on. If they still don’t respond, try resetting or check the charging cable.
2. How can I tell if my Beats are charging?
A red or amber LED indicates that charging is occurring. Once the light turns white or goes off, your Beats are fully charged. And then if you’re not seeing a light, try different charger or cable or charging port.
3. How long do I need to press the power button?
For most Beats models, depressing the power button for 1–2 seconds can turn them on. Keeping it held down for longer (5+ seconds) generally puts the device into pairing mode rather than turning on.
4. Beats blinking light what is the meaning of blinking light on Beats?
A flashing white light means your Beats are in pairing mode or trying to connect. Solid white means they’re connected. Red or amber means low battery, or it’s charging, of course.
5. Can I power on Beats without the case?
Yes – the talks with Beats and Apple over their Beats Fit Pro, as well as Powerbeats Pro, will turn on when you take them out of the charging case. If not, hold down the “b” button for a few seconds.
6. How can I reset my Beats headphones?
To reset most Beats, press and hold the power and volume down buttons simultaneously for 10 seconds, until the light flashes. This eliminates connection failures and returns the device to factory settings.
7. Why do my Beats keep turning off?
Beats turn off automatically when they’re not in use and deliver up to 40 hours of battery life. This is normal. If it’s a recurring issue, have you checked your firmware or Bluetooth connection?
Recap & Final Advice
Let’s bring it all home, and let you go unscrew somebody else’s headphones because by now you should be a certified Beats repair person.
- To turn on your Beats is to power them up.
- Pairing is what gets them connected to your phone or laptop; and they are not the same thing.
- If the lights don’t appear, first try charging and waiting don’t panic.
- When your Beats seem screwy or won’t connect, reset your Beats.
- Take good care of your battery with thoughtful charging habits.
- And if nothing works, or you don’t have time for a handful of tries with each of these options, remember that Apple Support is your best friend.
After you figure these things out, turning on and getting the most out of your Beats is easy even pleasant. You tap a button, the light goes on, the music plays, and all of a sudden your day is that much sunnier.
I still grin whenever I hear that lovely little ‘bloop’ as my Beats pair up with my phone. This is a subtle reminder that good tech doesn’t just make life easier it makes life sound better, too.
So feel free, with confidence to press that button. You’re ready to make beats.